As summer is just around the corner, I thought I would have a go at making a nice little sun-dress to wear when the weather get warmer (or perhaps if I go somewhere nice and hot on holiday). So when I saw this post on
icandy I decided to give it a go. I used the pattern as a basis and altered it to suit my tastes and needs (and my hips...).
I chose some really cute yellow gingham fabric and some daisy trim that we both on sale at one of the local fabric shops.
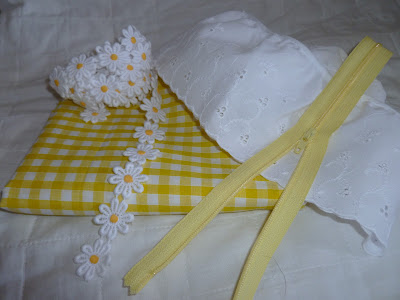 |
| The chosen fabrics and trim. |
I made up the pattern from the print-out and then laid it out on the fabric and pinned it. I then cut out the pieces leaving a seam allowance around the outside.
 |
| Here is the basic pattern cut out. |
The next step was to sew up the two bust darts on the front piece of the dress.
Following this, I then pinned the two back pieces together and positioning the zip (this seemed to take forever!). Then I sewed the back pieces with the zip in place.
 |
| Sew up the back with the zip in place |
Next - with the right sides facing pin the front and back together. Then stitch the shoulder seams and the side seams together.
 |
| pin the side and the shoulder seams |
 |
Once the shoulders and sides are sewn it really begins to look like a dress!
(even if it is inside out..) |
The next stage is focused upon the creation of the cap sleeves. Firstly, I prepared the facings for the armholes; matching them up - the left and the right. I then used the white edging fabric to create a small cap sleeve on each of the facing pieces.
 |
| The cap sleeve is initially attached to the arm facings |
Trim off the excess white edging fabric once it is stitched in place.
Next, the facing (complete with cap sleeve) is placed right sides together onto the main body of the dress. Stitch the facings onto the armholes.
 |
It should look like this when the facings are folded in
and the sleeves are exposed. |
Trim the seam allowance at the arm holes and then with the facings turned inward stitch them in place along the seam at the shoulder and side.
Now hem the neckline of the dress - carefully stitching the top of the zip in place. Following this, pin the daisy trim in place around the neck.
 |
| Daisy trim pinned in place and ready to be sewn. |
Hand sew the daisy chain in place (this seems to take forever!).
 |
| Keep stitching.... |
With all the daisies stitched in place it looks a little like this:
 |
| Front neckline |
 |
| Back neckline |
 |
| Front of dress |
 |
| Back of dress |
Now all I need to do is hem the bottom of the dress to make it look neat.
I was really worried that I would mess up the hem and ruin the dress. Thankfully, I was chatting to my Mum and she told me a really easy way to do a hem and make sure that it is nice and even.
How to make hemming easy based upon my Mum's advice:
 |
| Mark hemline with pins and fold |
 |
Press hemline
Put a few pins in to hold hem up.
Try dress on to check that the hem is even. |
 |
Trim excess fabric.
Fold rough edge under into hemline.
Pin in place. |
 |
| Sew hem in place |
Finally, a very badly taken photo of me trying the dress on (with a cute belt I found at Peacocks) surrounded by my sewing mess... I will get some decent pictures taken soon!
 |
| End result- a dress and a messy room! |


